Repair of Vintage Radio (Inside Electrical)
The internal electronics (vacuum tubes, capacitors resistors, coils) and wiring have
been replaced where needed.
All power supply electrolytic capacitors, waxed capacitors out of tolerance and out of tolerant
resistors > 20% replaced.
Repairs to tuning coils and replacement of the AC power cord and plug.
All tubes have been
tested and weak tubes replaced.
Speaker cones repaired or the speaker is replaced if the cone is hollowed out.
Tuner cords replaced
Final internal alignment performed.
Dusting and mild cleaning of the radio chassis performed.
Repair of Vintage Radio (Cabinet)
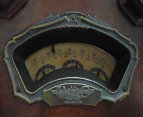
Tuning Dial replacement if severely cracked, warped
or hazy
Knobs replacement if missing or cracked
Speaker grill cloth cleaned or replaced if severely torn.
Some radio
fronts have photo finishes (faux) that are torn exposing the bare unstained wood. This shows as white gashes. Similar to torn
wallpaper exposing the primer painted sheet rock. In their day these faux paper coverings were used as a substitute for expensive
veneers. Many radios were trashed because of this cosmetic damage and many were stripped down, stained and kept. In today’s world
using software like photo shop and some
On some radios the photo finish front was completely worn out. To salvage the cabinet we sanded, stained and applied a light lacquer coating (Philco 37-610B and the Philco 80)
Plastic radio cracks are glued to keep form dislocating; some have been primed and spray-painted with high gloss plastic paint (Philco 48-464).
Most of the radio cabinets in the catalog required repairs to give the vintage radio a pleasant appearance for display.